Click on any picture for a larger version
Mirror-O-Matic
Overview
 When
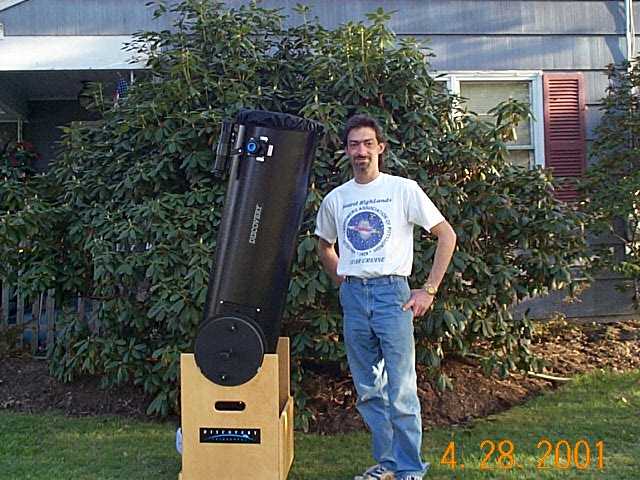
I started into astronomy back in the late fall of 1999 I had purchased
my 1st telescope. This was a 4.5" Newtonian on a equatorial mount.
This was a great scope for about a year, then aperture fever kicked in.
When
I started into astronomy back in the late fall of 1999 I had purchased
my 1st telescope. This was a 4.5" Newtonian on a equatorial mount.
This was a great scope for about a year, then aperture fever kicked in.
I did a lot of research on the Internet looking for information on telescopes. I had come across a wealth of information, from buying complete built telescopes, buying parts to build your own, to making all your telescope parts including grinding your own mirror.
Grinding your own telescope mirror seemed like a cool idea until I did more research and discovered all the physical hours needed to grind and polish. I'm not a physical person in the sense of doing physical labor. I rather do 4 hours of mental gymnastics verse 1 hour of physical labor.
Since at the time mirror grinding seemed like a forever task, I started looking at buying the parts to build route. Again a wealth of information was found from the ATM news group to the ATM web ring. I was looking to build or buy the largest aperture I could afford, so the Dobsonian telescope seemed like the ideal scope for me.
After debating on what parts to use, cost of all the materials, an time involved I opted out to buy one. I wanted something to use now so I purchased a Discovery-Telescope 12.5" PDHQ. (This is a great scope BTW)
Doing Things Backwards
 A
year after the purchase of the 12.5" DOB I decided to back track
an try my hand at building a telescope. I figure now that I had something
to observe with I can take my time an try a hand at some of the ATM ideas
found in the past.
A
year after the purchase of the 12.5" DOB I decided to back track
an try my hand at building a telescope. I figure now that I had something
to observe with I can take my time an try a hand at some of the ATM ideas
found in the past.
After finding a good source for economical priced plate glass kits. I decided to try my hand at grinding an polishing my own mirror.
Before I took the plunge of buying glass I wanted to see if I could build the required devices needed to grind, polish, and test a mirror.
- Build a Ronchi / foucault tester.
- Build a machine to grind the mirror (AKA mirror-o-matic)
- Buy some glass.
Mirror-O-Matic
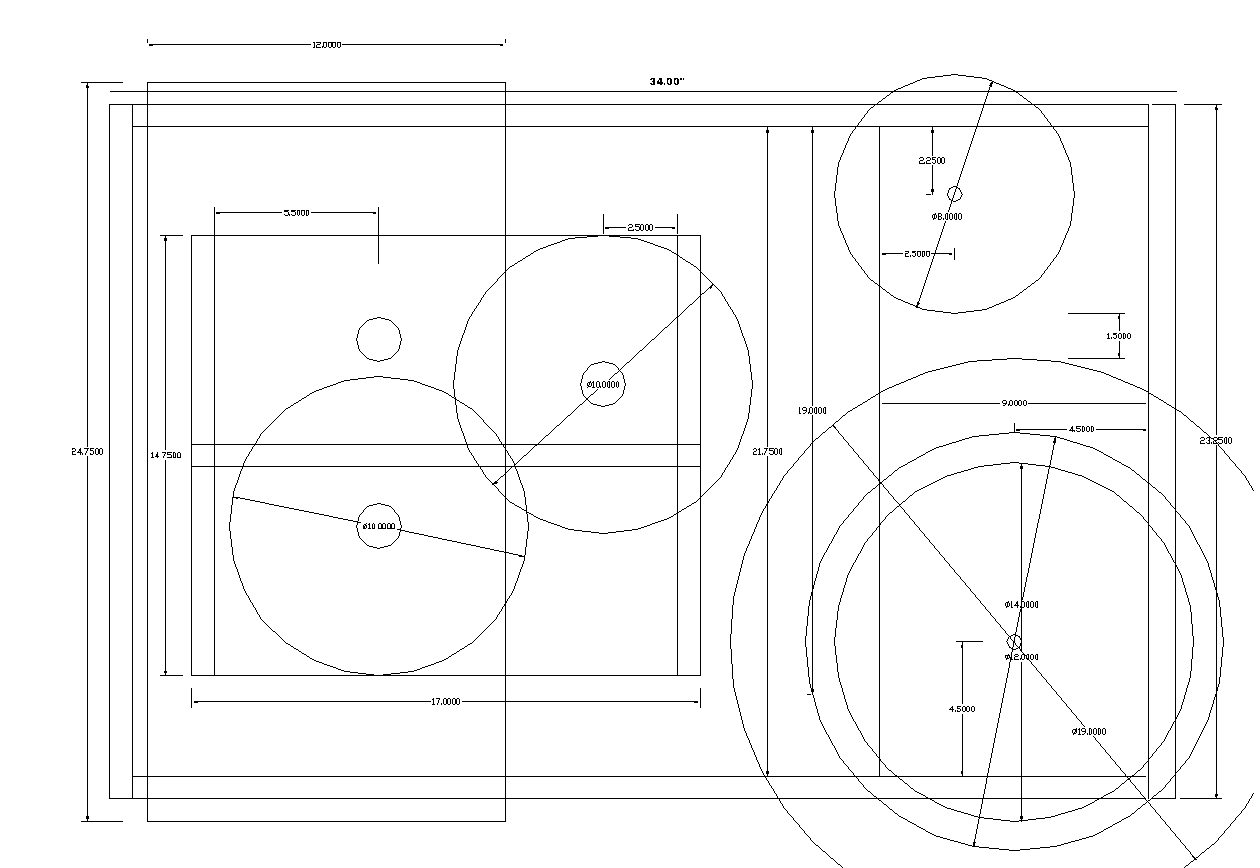
One of the coolest ideas I found on the Web was this thing called a Mirror-O-Matic. Credit goes to Dennis Rech for making available the plans on the Internet on how to build it. This seemed like a device I could build with scrap wood an parts laying around the house. After studying the construction manual on Dennis Rech web page and following the size cut out plans found on Ed Stevens web page I came up with a slightly larger version.
The original plans seemed to handle up to 10" - 12" max mirror size. I tried to scale mine up so IF in the future I wanted to add a larger turntable I could. I was trying to allow for at least 16" max. Drawing things up with Autocad (1), (1a) this seemed like it would work at least in theory. ("I would still need to change some of the current hardware being used like the turntable and eccentric shafts to accommodate this")
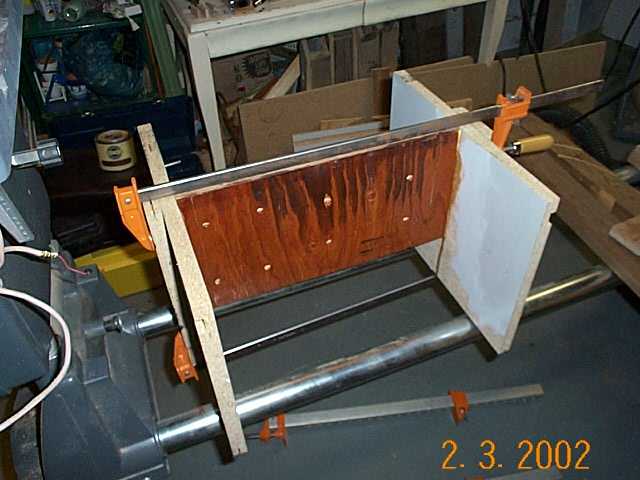
Construction
 All
the wood used consisted of 3/4" dumpster ply. This is plywood that
is acquired for free. The majority of what I used was this laminated MDF
stuff that weighed a ton. I had a 1725 rpm 1/3 hp blower motor that was
laying around. This was left in my house when I bought it in 1990 from
the previous owners. :-) All the other hardware nuts, bolts, screws, pillow
blocks, blower shafts, etc... were purchased from the local hardware stores
(Lowes, Home Depot, Sears hardware, five-and-dime junk store) around my
area.
All
the wood used consisted of 3/4" dumpster ply. This is plywood that
is acquired for free. The majority of what I used was this laminated MDF
stuff that weighed a ton. I had a 1725 rpm 1/3 hp blower motor that was
laying around. This was left in my house when I bought it in 1990 from
the previous owners. :-) All the other hardware nuts, bolts, screws, pillow
blocks, blower shafts, etc... were purchased from the local hardware stores
(Lowes, Home Depot, Sears hardware, five-and-dime junk store) around my
area.
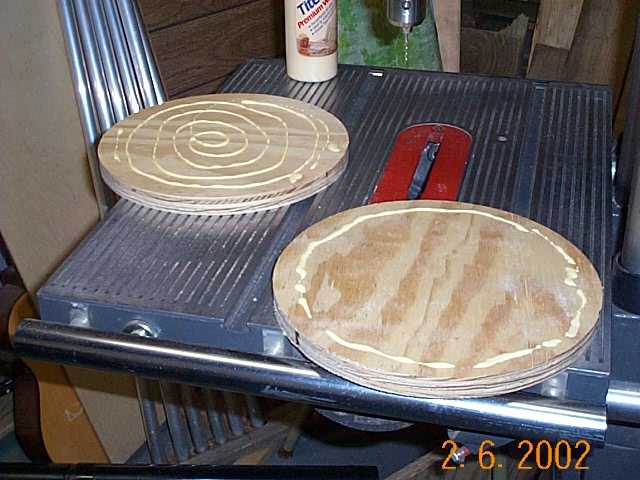
 I
did not want to put to much money into building this device so I improvised
where I could. All the pulleys used that were over 8" I made out
of wood.
I
did not want to put to much money into building this device so I improvised
where I could. All the pulleys used that were over 8" I made out
of wood.
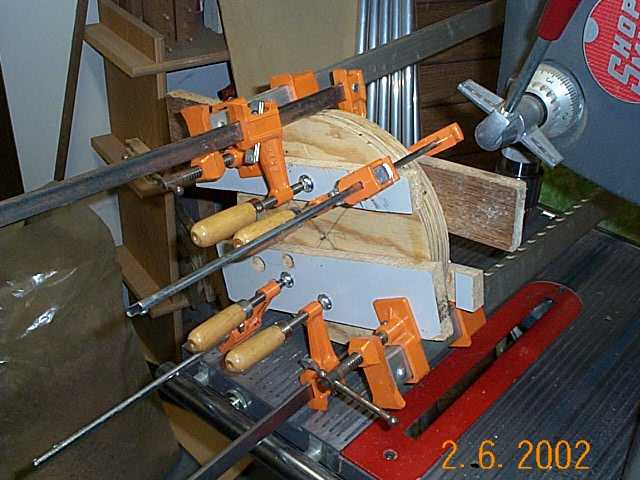
I was not to sure at first if this would work so I made 1 10" and tested it with the 1725 rpm 1/3 hp motor that would be used for the power head (1), (2), (3).
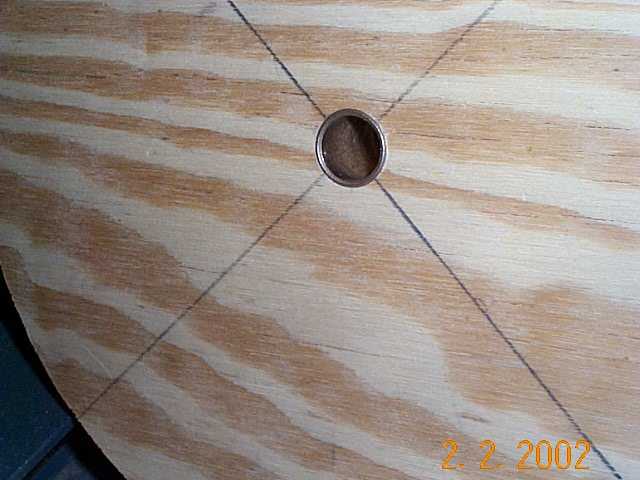
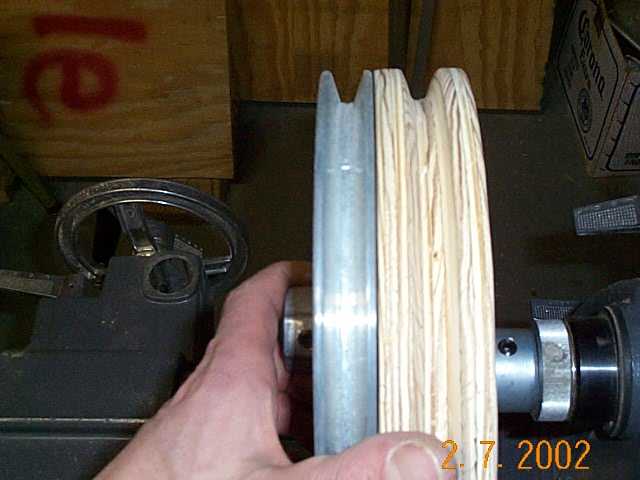
 All
the wood used for my pulleys consisted of 2 plywood disks 3/4". Glued
then clamped overnight. After gluing I drilled a 3/4" hole that allowed
a 5/8" brass bushing insert.
All
the wood used for my pulleys consisted of 2 plywood disks 3/4". Glued
then clamped overnight. After gluing I drilled a 3/4" hole that allowed
a 5/8" brass bushing insert.
I then used a face plate for the main backing an drive connection.
 The
real test on seeing if this plywood pulley was going to work was when
I trued it up on my lathe. My slowest speed on the lathe is @700 rpm.
The fastest this would spin on the m-o-m would be under 300 rpm The lathe
did a nice job also for creating the V belt groove. Looks good enough
for government work.
The
real test on seeing if this plywood pulley was going to work was when
I trued it up on my lathe. My slowest speed on the lathe is @700 rpm.
The fastest this would spin on the m-o-m would be under 300 rpm The lathe
did a nice job also for creating the V belt groove. Looks good enough
for government work.
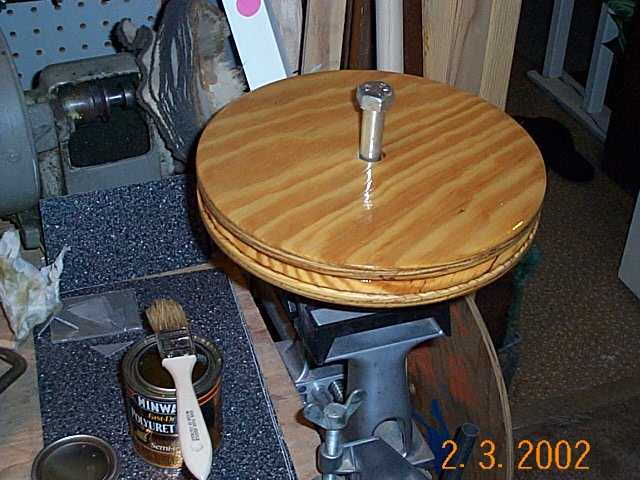
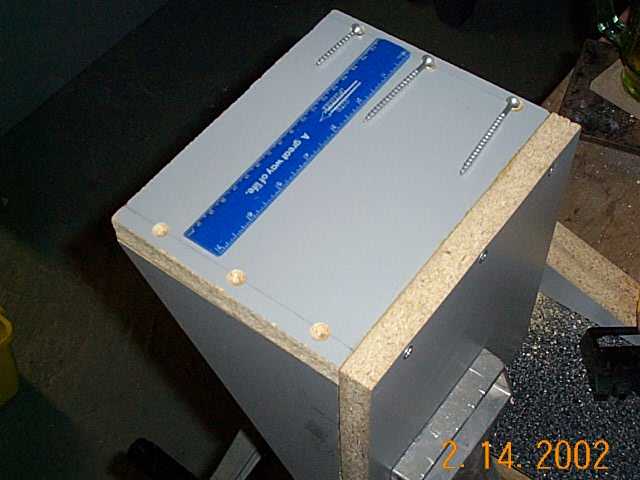
The final touches for the pulleys was to apply several coats of polyurethane.
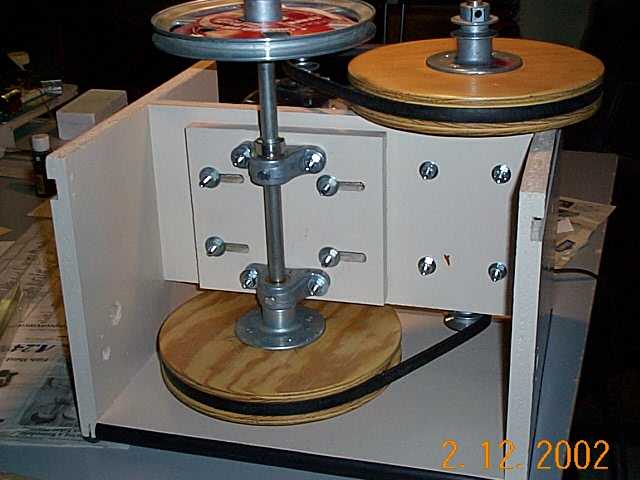
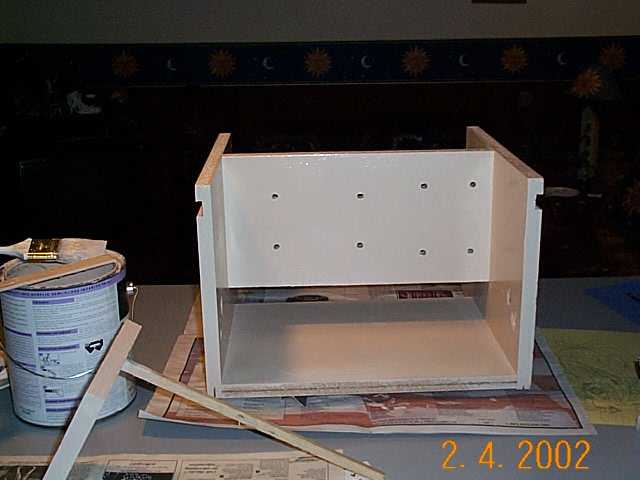
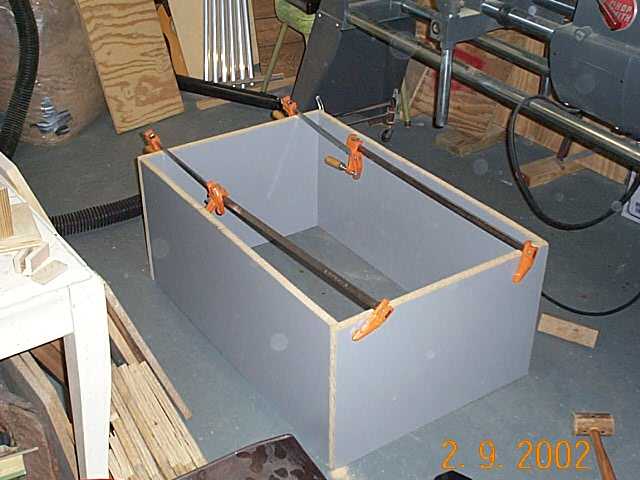
The main box (1), (2) was glued and screwed. Along with all other wooden parts (1), (2).
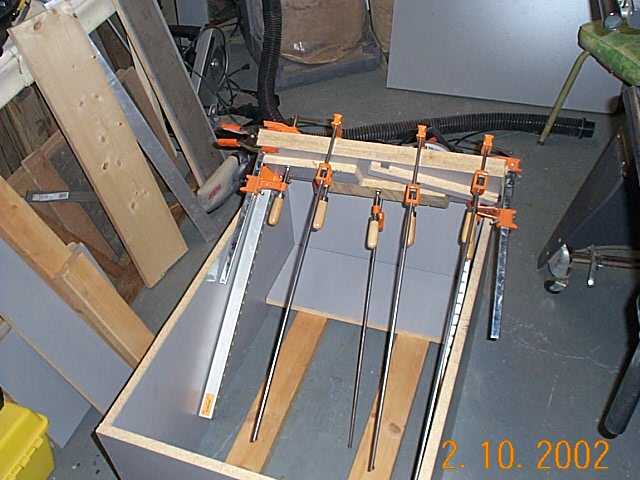
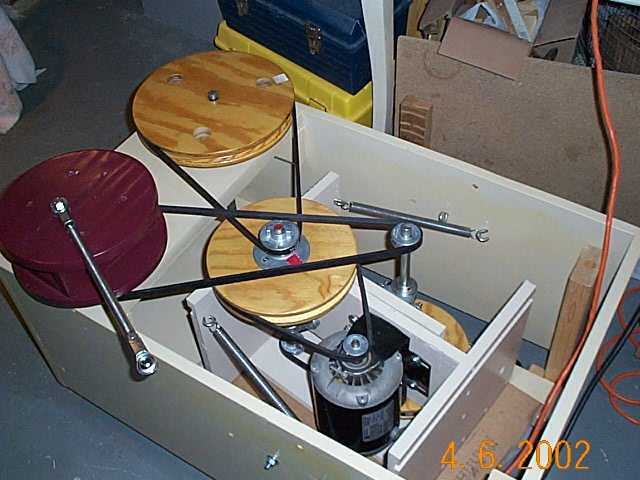
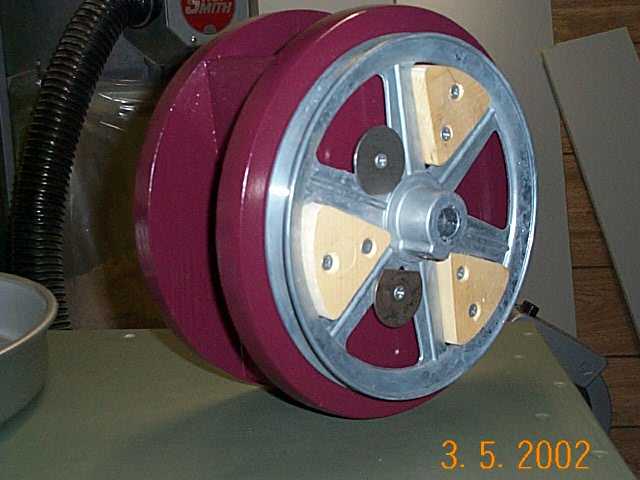
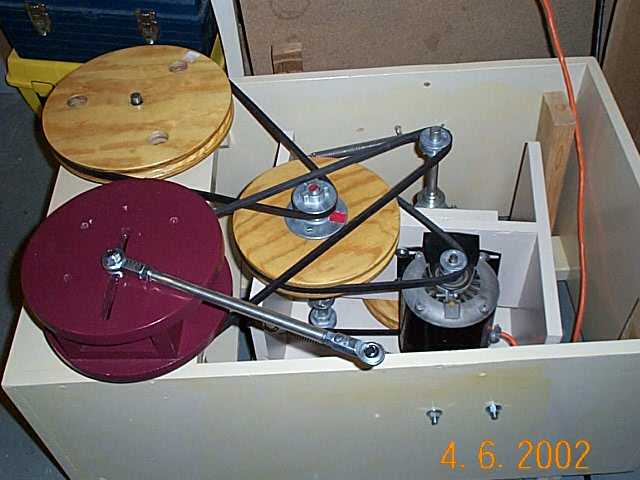 For
the main turntable drive pulley I drilled 3 1.25" holes. The 14"
platter that holds the mirror has 3 1.25" wooden dowel that matches
these holes.
For
the main turntable drive pulley I drilled 3 1.25" holes. The 14"
platter that holds the mirror has 3 1.25" wooden dowel that matches
these holes.
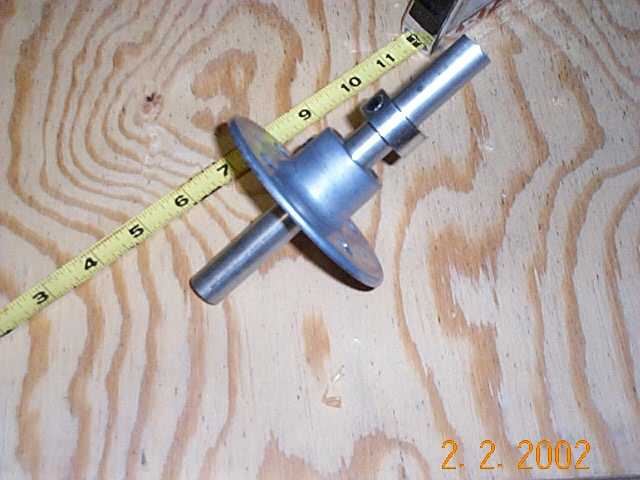
For the eccentric (1) I used dog ears like Dennis Rech mentions in his construction manual.
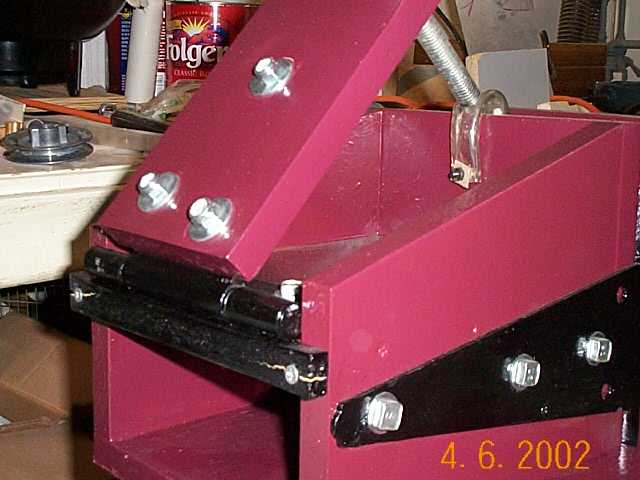 I
added bumper guards for protection on the overarm assembly. I used a piece
of rubber hose on the top to keep the overarm drive pin from crushing
the back side of the assembly an a small strip of wood under the overarm
to keep it from diving into the mirror.
I
added bumper guards for protection on the overarm assembly. I used a piece
of rubber hose on the top to keep the overarm drive pin from crushing
the back side of the assembly an a small strip of wood under the overarm
to keep it from diving into the mirror.
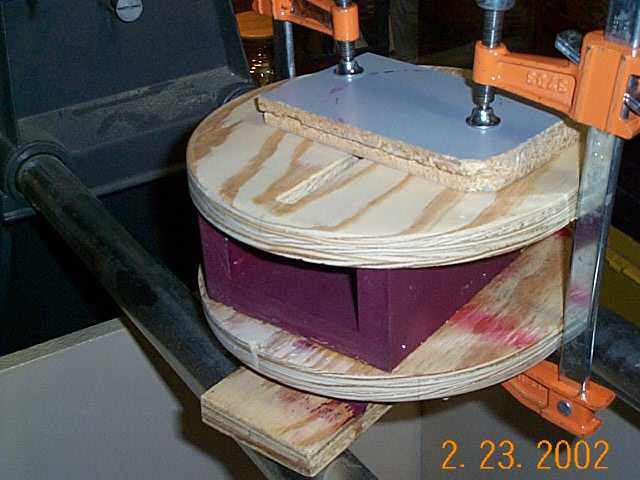
 While
I was in the construction process of the Mirror-O-Matic I had ordered
a 10" an 8" plate glass kit.
Here is the 10" ready for fine grinding. The only part I could not
find locally was the toggle pad used in the overarm assembly. This part
I ordered from Reid
Tool Supply Company
While
I was in the construction process of the Mirror-O-Matic I had ordered
a 10" an 8" plate glass kit.
Here is the 10" ready for fine grinding. The only part I could not
find locally was the toggle pad used in the overarm assembly. This part
I ordered from Reid
Tool Supply Company
The 8" came at a later time then the 10". The 8" was the one I wanted to use as my learning curve. As of this writing I have successfully ground an polished the 8" to a F6. I'm currently in the process of learning how to parabolize it. :-O